Hey, dog lovers! I’m Dr. Arif Aziz, and in this blog post, I’m going to talk about how to restrain a dog for nail clipping. I’ve learned a lot from books written by experts in veterinary medicine and from my own experience working with dogs.
Clipping a dog’s nails can be tricky for many dog owners. But it’s really important to do it right for your dog’s comfort and safety. I’ll share some helpful techniques with you to make nail clipping easier.
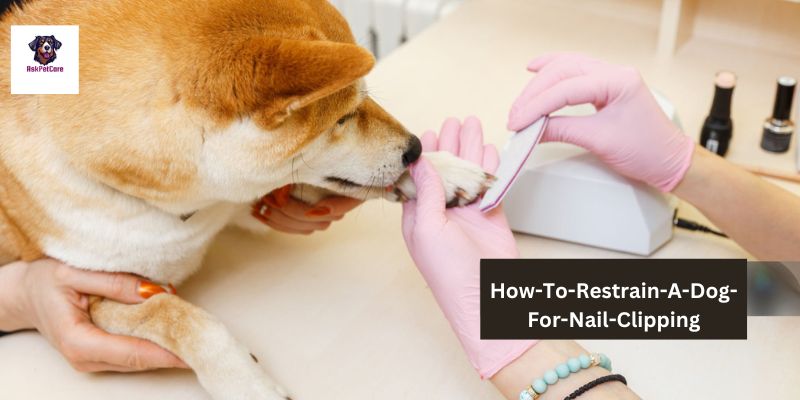
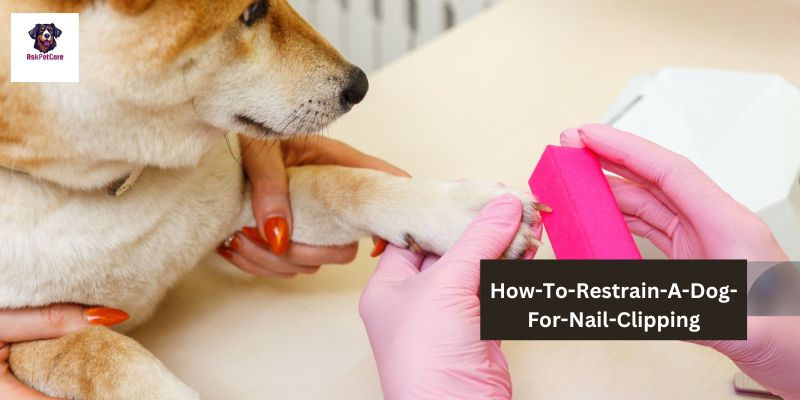
I’ve clipped nails for many dogs, from puppies to seniors, and I’ve worked with all kinds of breeds. It’s crucial to handle your dog carefully during nail clipping to avoid hurting them. I always use a muzzle on the dog’s mouth, and my assistant helps to hold the dog while I do the clipping.
In this blog, I’ll explain the methods and tools I use for nail clipping. It’s important to do it safely and gently to keep your furry friend happy and healthy. Let’s get started,
Clipping a dog’s nails might seem like a small task, but it’s a big deal for your furry friend’s health and comfort. Just like us, dogs need their nails trimmed regularly to prevent them from getting too long and causing problems.
But here’s the thing: many dog owners find nail clipping challenging. It’s not always easy to convince our canine companions to sit still for this task, and there’s always the worry of accidentally hurting them if we cut their nails too short.
First Understands Some Common Concerns Or Challenges:
- Nervousness: Dogs can get anxious or scared when it comes to nail clipping. They might squirm, pull away, or even become aggressive.
- Fear of Hurting the Dog: Many owners worry about accidentally cutting the quick—the sensitive part of the nail that contains blood vessels and nerves—and causing pain or bleeding.
- Difficulty Holding Still: Dogs aren’t always cooperative when it comes to holding still for nail clipping. They might wriggle around or try to escape, making the process frustrating for both the dog and the owner.
- Lack of Experience: Some dog owners feel unsure about how to clip their dog’s nails properly. They worry about using the right tools and techniques without hurting their furry friend.
These concerns are totally understandable! But with a little know-how and patience, you can overcome these challenges and keep your dog’s nails in tip-top shape. Let’s dive into how to make nail clipping a stress-free experience for both you and your pup.
Now Understand Your Dog’s Nails:
Have you ever taken a closer look at your dog’s nails? They’re not just there for looks—they play an important role in your pup’s overall health and comfort. Let’s break down the anatomy of a dog’s nails and why regular maintenance is crucial.
- Anatomy of a Dog’s Nail:
- A dog’s nail consists of several parts: the hard outer shell called the “keratin,” the inner quick, and the blood vessels and nerves inside.
- The keratin is the tough outer covering that protects the sensitive inner layers of the nail.
- The quick is the pinkish area inside the nail where the blood vessels and nerves are located. It’s essential for providing nutrients to the nail and maintaining its health.
- The Importance of Regular Nail Maintenance:
- Just like humans, dogs’ nails grow continuously. Without regular trimming, they can become too long and cause discomfort or even health issues.
- Long nails can make it difficult for dogs to walk properly, leading to pain, joint problems, and even injuries.
- Additionally, overgrown nails are more prone to splitting or breaking, which can be painful for your furry friend.
Now, here’s where the importance of regular nail maintenance comes in: By keeping your dog’s nails trimmed to an appropriate length, you can prevent these problems and ensure your pup stays happy and healthy. Plus, it can make walking and running more comfortable for them, which is essential for their overall well-being. So, don’t forget to give those nails some attention—it’s a small task that makes a big difference in your dog’s life!
Choosing The Right Tools For Nail Clipping:
When it comes to clipping your dog’s nails, having the right tools can make all the difference. There are several types of nail clippers available, each with its own pros and cons. Let’s take a closer look at the options and how to choose the best one for your furry friend.
- Types of Nail Clippers:
- Guillotine Clippers: These clippers have a hole where you insert your dog’s nail, and a blade slices through it when you squeeze the handles. They’re great for small to medium-sized dogs with thinner nails.
- Scissor Clippers: Similar to scissors, these clippers have two blades that come together to cut the nail. They’re suitable for dogs of all sizes and are especially useful for thick nails.
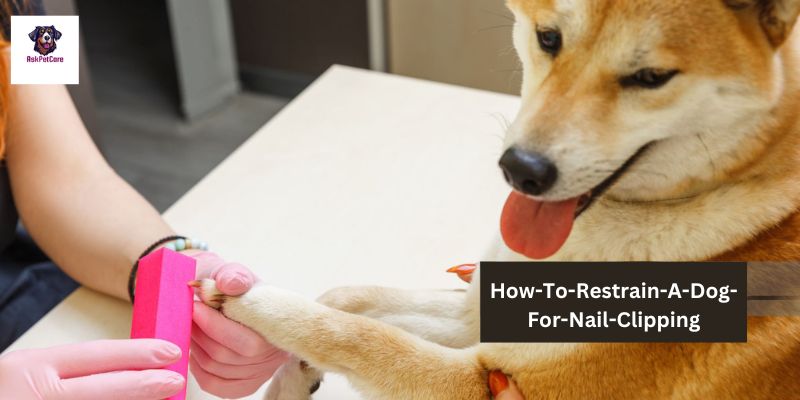
- Grinders: Nail grinders use a rotating abrasive wheel to gradually sand down your dog’s nails. They’re gentle and precise, making them ideal for dogs who are nervous about clippers or have sensitive nails.
- Tips for Selecting the Right Tool:
- Consider your dog’s size: For small dogs, guillotine or scissor clippers are usually sufficient. Larger dogs may benefit from the power and precision of a grinder.
- Take your dog’s temperament into account: If your dog is nervous or fidgety, a grinder might be a better option since it’s less likely to cause discomfort or injury.
- Evaluate your own comfort level: Some owners find certain types of clippers easier to use than others. Choose a tool that you feel confident and comfortable using to ensure a smooth nail-clipping experience for both you and your dog.
Remember, the key is to choose a nail clipper that suits both your dog’s needs and your own preferences. By selecting the right tool and using it properly, you can keep your dog’s nails trimmed and healthy without any stress or hassle.
Preparing Your Dog for Nail Clipping:
Getting your dog comfortable with the nail-clipping process is essential for a stress-free experience. Here are some tips to help you acclimate your furry friend to nail clipping gradually and desensitize them to the sight and sound of nail clippers:
- Start Slowly: Introduce your dog to the nail clipping process gradually to prevent overwhelming them. Begin by simply handling their paws gently without attempting to clip their nails. Offer treats and praise to create a positive association with paw handling.
- Familiarize Them with the Clippers: Let your dog sniff and investigate the nail clippers without using them initially. This helps them become accustomed to the sight and smell of the clippers without feeling threatened or anxious.
- Associate Clippers with Positive Experiences: Pair the presence of the nail clippers with treats, playtime, or cuddles to create a positive association. For example, show your dog the clippers before offering their favorite treat, gradually increasing their comfort level with the tool.
- Practice Desensitization Techniques:
- Touch Sensitization: Gently touch your dog’s paws with the clippers (without clipping) to desensitize them to the sensation. Reward calm behavior with treats and praise.
- Sound Desensitization: Familiarize your dog with the sound of the clippers by clicking them together or turning them on (if using a grinder) without clipping any nails. Pair the sound with positive experiences, such as treats or playtime, to help your dog associate it with something enjoyable.
- Use Counterconditioning: If your dog shows signs of fear or anxiety during the nail-clipping process, counterconditioning can help. This involves gradually exposing your dog to the feared stimulus (in this case, nail clipping) while providing rewards to create a positive emotional response.
- Be Patient and Consistent: Building your dog’s confidence with nail clipping takes time and patience. Practice short sessions regularly, and progress at your dog’s pace. Stay calm and patient, and avoid rushing or forcing your dog to tolerate the process.
By following these tips and techniques, you can help your dog feel more comfortable and relaxed during nail-clipping sessions. With patience, consistency, and plenty of positive reinforcement, you can make nail clipping a stress-free experience for both you and your furry friend.
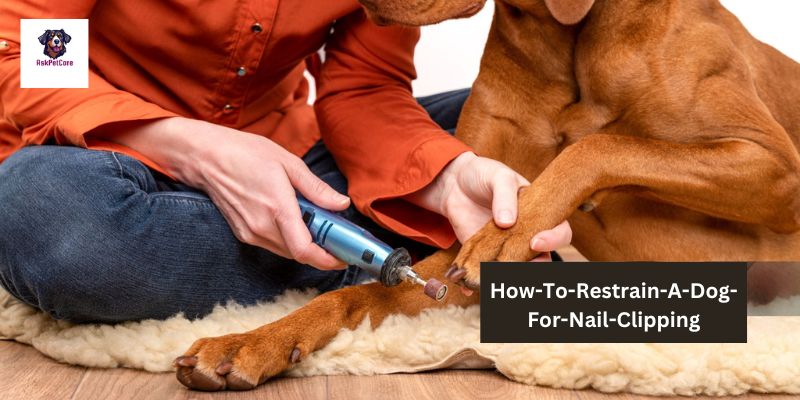
Restraint Techniques:
Safely restraining your dog during nail clipping is crucial to prevent injury to both you and your furry friend. Here’s why it’s important and some gentle restraint methods you can use:
- Importance of Safe Restraint:
- Dogs can be wiggly or nervous during nail clipping, making it easy for accidents to happen if they suddenly jerk away.
- Proper restraint helps keep your dog still and secure, reducing the risk of accidentally cutting the quick or causing injury.
- Gentle Restraint Methods:
- Using a Grooming Table: If you have access to a grooming table, it can provide a secure surface for your dog during nail clipping. Secure your dog to the table with a grooming arm or leash attached to a sturdy surface. This keeps them stable and prevents them from jumping or moving around too much.
- Enlisting the Help of a Second Person: Having another person assist you during nail clipping can be very helpful. One person can hold and comfort the dog while the other trims the nails. This ensures that your dog feels safe and supported throughout the process.
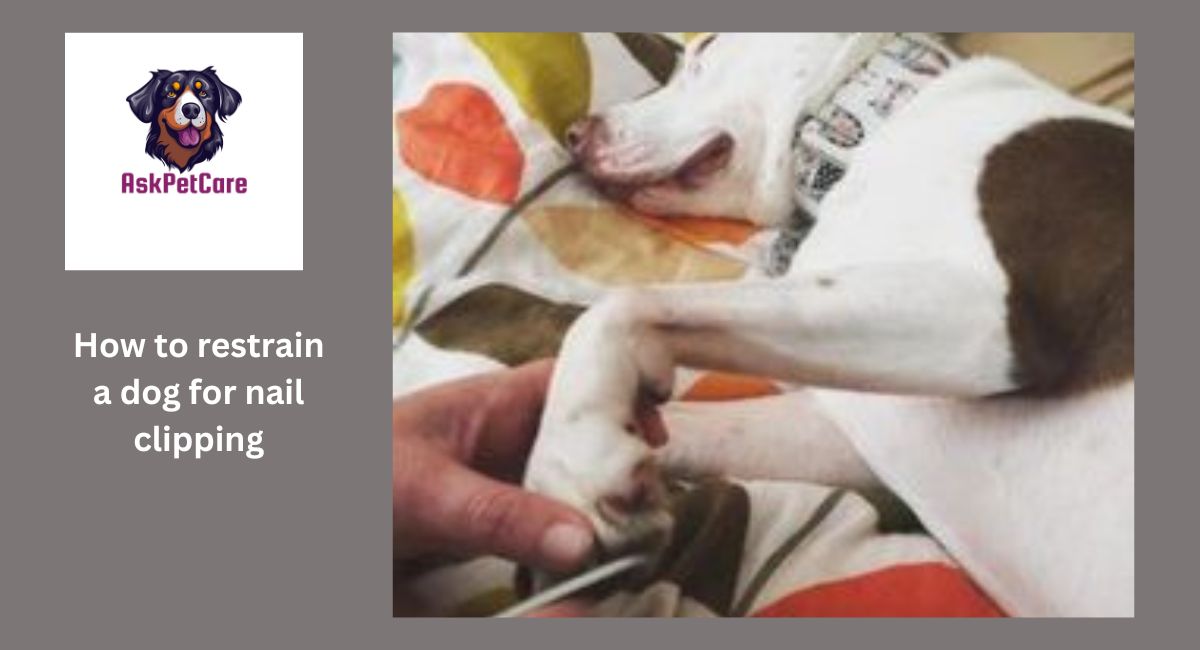
- Towel Wrap Technique: For smaller dogs or those who may be more anxious, the towel wrap technique can be effective. Gently wrap your dog in a towel, leaving one paw exposed at a time for nail clipping. The snug wrap can help your dog feel secure and prevent them from squirming too much.
- Maintaining Calmness and Patience:
- Regardless of the restraint method you choose, it’s essential to remain calm and patient throughout the nail-clipping process.
- Speak to your dog in soothing tones and offer reassurance and treats to help keep them relaxed.
Remember, the goal of restraint during nail clipping is to keep your dog safe and still, not to cause them distress. Choose a method that works best for your dog’s size, temperament, and comfort level. With gentle restraint and patience, you can make nail clipping a stress-free experience for both you and your furry friend.
Step-by-Step Nail Clipping Guide:
Nail clipping might seem daunting at first, but with a little know-how, you can master the process in no time. Here’s a step-by-step guide to help you trim your dog’s nails safely and effectively:
- Gather Your Tools:
- Before you begin, make sure you have all the necessary tools on hand: nail clippers (guillotine, scissors, or grinder), styptic powder (to stop bleeding if needed), and treats for positive reinforcement.
- Find a Comfortable Spot:
- Choose a quiet, well-lit area where you and your dog can both feel relaxed. Some dogs may prefer to sit or lie down, while others may be more comfortable standing.
- Examine the Nails:
- Take a close look at your dog’s nails to determine where to trim. Identify the quick—the pinkish area inside the nail where the blood vessels and nerves are located. Avoid cutting into the quick, as it can cause pain and bleeding.
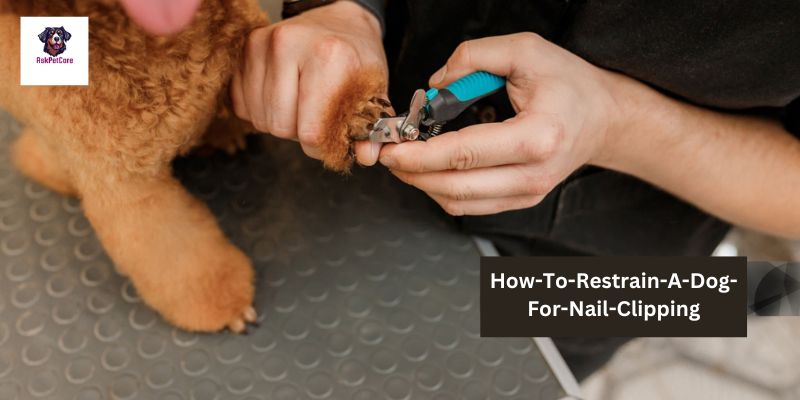
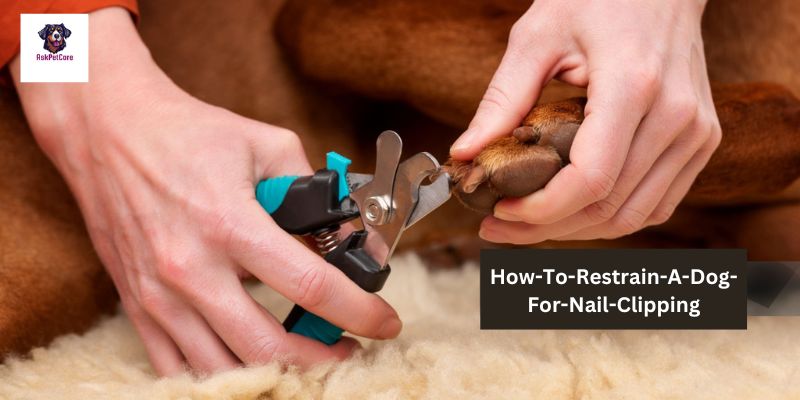
- Trimming Technique:
- Hold the nail clippers securely and position them at a 45-degree angle to the nail.
- Snip off a small portion of the nail at a time, being careful not to cut too close to the quick.
- If using a grinder, gently apply the rotating abrasive wheel to the nail in short intervals until you reach the desired length.
- Proper Clipping Angles:
- Clip the nail at a slight angle, rather than straight across, to prevent the nail from splitting or becoming ingrown.
- For dogs with dark nails, it can be challenging to see the quick. Trim small amounts of the nail at a time, gradually working your way closer to the quick. Stop trimming when you see a grayish or pinkish circle in the center of the nail—this indicates you’re near the quick.
- Take Breaks if Needed:
- If your dog becomes anxious or restless during the nail-clipping process, take breaks as needed. Offer reassurance and rewards to help keep them calm and relaxed.
- Apply Styptic Powder if Bleeding Occurs:
- In case you accidentally cut the quick and your dog’s nail starts bleeding, don’t panic. Apply styptic powder or cornstarch to the affected area to help stop the bleeding. Hold gentle pressure on the nail for a few minutes until the bleeding stops.
- Reward Your Dog:
- Once you’ve finished trimming all the nails, be sure to reward your dog with praise and treats for their cooperation. This helps create a positive association with nail clipping and makes future sessions easier.
By following these step-by-step instructions and taking your time, you can trim your dog’s nails safely and confidently. Remember, practice makes perfect, so don’t be discouraged if it takes a few tries to get the hang of it. With patience and consistency, nail clipping will become a routine part of your dog’s grooming regimen.
Dealing With Challenges During Nail Clipping:
Nail clipping can sometimes be a tricky task, especially if your dog is nervous or resistant. But fear not! Here are some common challenges that may arise during nail clipping and practical tips to help you overcome them:
- Nervousness or Anxiety:
- Tip: Start by introducing your dog to the nail clipping process gradually. Offer treats and praise to create a positive association with the Clippers. Take breaks if your dog becomes anxious, and reassure them with calming words and gentle strokes.
- Resistance or Squirming:
- Tip: Use gentle restraint techniques to keep your dog still during nail clipping. Enlist the help of a second person to hold and comfort your dog while you trim the nails. Alternatively, try distracting your dog with their favorite toy or treat to keep them occupied.
- Difficulty Identifying the Quick:
- Tip: If your dog has dark nails and it’s challenging to see the quick, trim small amounts of the nail at a time. Stop trimming when you see a grayish or pinkish circle in the center of the nail—this indicates you’re nearing the quick. It’s better to trim too little than too much to avoid cutting into the quick.
- Accidental Bleeding:
- Tip: If you accidentally cut the quick and your dog’s nail starts bleeding, remain calm. Apply styptic powder or cornstarch to the affected area to help stop the bleeding. Maintain gentle pressure on the nail for a few minutes until the bleeding stops. Offer your dog comfort and reassurance throughout the process.
- Fear of Clippers or Grinder:
- Tip: If your dog is scared of the nail clippers or grinder, desensitize them to the sight and sound gradually. Start by letting them sniff and investigate the tools without using them. Pair the presence of the clippers with treats or playtime to create a positive association. Take your time and be patient—building trust takes time.
- Refusal to Cooperate:
- Tip: If your dog refuses to cooperate during nail clipping, don’t force the issue. Take a break and try again later when your dog is calmer. Break the process down into smaller steps and reward your dog for each successful step to build their confidence over time.
Remember, every dog is unique, and what works for one may not work for another. Be patient, stay calm, and adapt your approach to suit your dog’s individual needs. With patience and persistence, you can overcome common challenges and make nail clipping a positive experience for both you and your furry friend.
Post-Clipping Care Applying Styptic Powder Or Cornstarch To Stop Bleeding If The Quick Is Accidentally Cut:
After you’ve finished trimming your dog’s nails, it’s essential to provide proper aftercare to ensure their comfort and well-being. Here’s why aftercare is important and some recommendations for soothing your dog after the nail clipping session:
- Importance of Aftercare:
- Aftercare helps to minimize any discomfort or irritation your dog may experience after nail clipping.
- It’s especially crucial if you accidentally cut the quick, as it can cause bleeding and discomfort for your furry friend.
- Proper aftercare can also help reinforce positive associations with nail clipping, making future sessions easier.
- Stopping Bleeding:
- If you accidentally cut the quick and your dog’s nail starts bleeding, don’t panic. Apply styptic powder or cornstarch to the affected area to help stop the bleeding. These substances work by contracting the blood vessels and promoting clotting.
- Gently apply the powder or cornstarch to the bleeding nail and maintain light pressure for a few minutes until the bleeding stops. Avoid using tissue paper or paper towels, as they can stick to the wound.
- Soothing Your Dog:
- After the nail clipping session, it’s essential to soothe and comfort your dog to help them relax.
- Offer verbal praise, gentle strokes, and comforting words to reassure your dog that everything is okay. Positive reinforcement helps to create a positive association with nail clipping and builds trust between you and your furry friend.
- If your dog seems stressed or anxious, try engaging in calming activities such as cuddling, playing their favorite game, or going for a relaxing walk. Distraction and relaxation techniques can help alleviate any lingering tension.
- Inspecting the Nails:
- Take a moment to inspect your dog’s nails after clipping to ensure they’re all trimmed to the appropriate length and there are no signs of bleeding or injury.
- If you notice any excessive bleeding, swelling, or signs of infection, consult your veterinarian for further guidance and treatment.
By providing proper aftercare following nail clipping, you can help ensure your dog’s comfort and well-being. Remember to stay calm, be gentle, and offer plenty of love and reassurance to your furry friend throughout the process. With patience and care, nail clipping can be a positive experience for both you and your dog.
How To Restrain A Small Dog For Nail Clipping:
Restaining a small dog for nail clipping requires gentle and effective techniques to keep them calm and still throughout the process. Here’s how to do it step by step:
- Choose a Comfortable Location: Select a quiet and comfortable area where your dog feels relaxed. This could be a cozy corner of your home or a familiar spot where your dog feels safe.
- Use a Non-Slip Surface: Place a non-slip mat or towel on the floor to provide your dog with stability and prevent them from slipping or sliding during nail clipping.
- Sit Comfortably: Sit on the floor or a comfortable chair so you can be at eye level with your dog. This helps to establish trust and allows you to monitor their body language for signs of discomfort or stress.
- Gentle Restraint Techniques: There are several gentle restraint techniques you can use to keep your small dog still during nail clipping:
- Hold Firmly but Gently: Hold your dog’s paw firmly but gently to prevent them from pulling away. Use your other hand to support their body if needed.
- Wrap in a Towel: If your dog is particularly squirmy or anxious, you can gently wrap them in a towel to provide a sense of security and prevent them from moving around too much.
- Enlist a Helper: If possible, ask a family member or friend to assist you by holding your dog’s body still while you trim their nails. This allows you to focus on the nail clipping process without worrying about restraining your dog.
- Offer Treats and Positive Reinforcement: Throughout the nail clipping session, offer your dog plenty of treats and praise to reinforce positive behavior. This helps to create a positive association with nail clipping and makes the experience more enjoyable for your furry friend.
- Take Breaks if Needed: If your dog becomes stressed or agitated during nail clipping, take breaks as needed to allow them to relax and calm down. Offer gentle strokes and soothing words to help reassure them.
- Stay Calm and Patient: Remain calm and patient throughout the nail-clipping process. Dogs can sense when their owners are anxious or stressed, which can make them feel more nervous. Speak to your dog in a calm and soothing voice to help keep them relaxed.
By following these steps and using gentle restraint techniques, you can effectively restrain your small dog from nail clipping while keeping them calm and comfortable. Remember to take your time, stay patient, and reward your dog for their cooperation throughout the process.
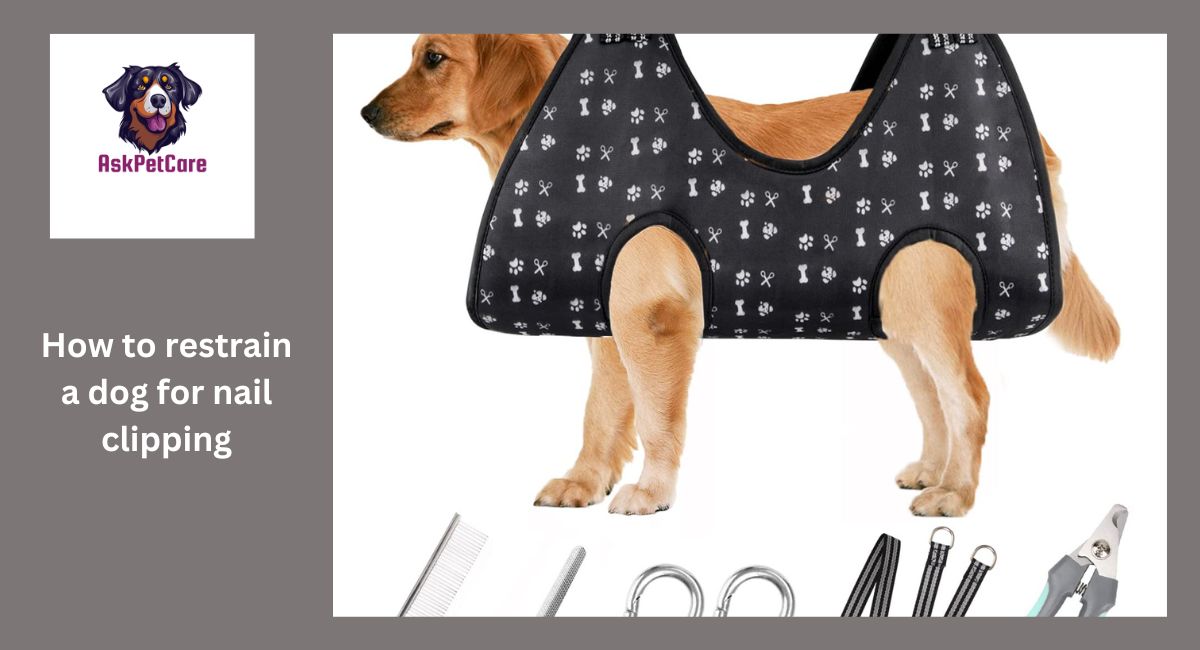
Homemade Dog Sling For Cutting Nails.
Making a homemade dog sling for cutting nails is a simple and effective way to restrain your dog comfortably during the nail clipping process. Here’s how you can make one:
Materials Needed:
- A long, sturdy piece of fabric or a soft scarf (such as fleece or cotton)
- Scissors
Instructions:
- Start by selecting a piece of fabric that is long enough to wrap comfortably around your dog’s body and secure them in place. A soft scarf or a piece of fleece fabric works well for this purpose.
- Lay the fabric flat on a clean, flat surface. Measure and cut the fabric to the desired length, ensuring that it is long enough to wrap around your dog’s body with some extra length for tying.
- Hold the fabric lengthwise and fold it in half horizontally, so you have a doubled-over strip of fabric.
- Place your dog on the fabric and position it so that the folded edge of the fabric is under your dog’s belly, and the open ends are on either side of their body.
- Gently lift your dog’s front legs and bring the ends of the fabric up and over their back, crossing them over each other. The fabric should cradle your dog’s body snugly but not too tightly.
- Secure the ends of the fabric by tying them together securely on your dog’s back or chest. Make sure the knot is tight enough to hold your dog in place but not so tight that it causes discomfort.
- Adjust the sling as needed to ensure that your dog is properly supported and comfortable. You may need to experiment with the length and positioning of the fabric to find the best fit for your dog.
- Once your dog is securely in the sling, you can proceed with trimming their nails. The sling will help to keep them still and prevent them from squirming or pulling away during the nail clipping process.
- After you’ve finished trimming your dog’s nails, carefully untie the sling and remove it from your dog’s body. Be sure to praise and reward your dog for their cooperation during the nail clipping session.
By following these simple steps, you can create a homemade dog sling to help restrain your dog comfortably while cutting their nails. This DIY solution is practical, and cost-effective, and ensures that your dog remains safe and secure during grooming sessions.

How To Restrain A Dog With A Towel.
Restrain a Dog with a Towel:
Using a towel to restrain a dog is a gentle and effective way to keep them still during nail clipping or other grooming tasks. Here’s how you can do it step by step:
- Select a Suitable Towel: Choose a soft, sturdy towel that is large enough to wrap around your dog comfortably. A bath towel or beach towel works well for this purpose.
- Prepare Your Dog: Before you begin, take a moment to calm your dog and reassure them. Speak to them in a soothing tone of voice and offer treats or praise to help them relax.
- Position the Towel: Lay the towel flat on a clean, flat surface, such as the floor or a grooming table. Position your dog so that they are standing or lying down on top of the towel.
- Wrap the Towel Around Your Dog: Starting from one end of the towel, gently lift your dog’s paw and wrap the towel around their leg. Be sure to leave enough room for your dog to move comfortably, but snug enough to prevent them from pulling their paw away.
- Secure the Towel: Once the towel is wrapped around your dog’s leg, gently fold the excess fabric over the top of their paw and tuck it underneath. This helps to secure the towel in place and prevent your dog from escaping.
- Repeat for Each Paw: Repeat the process for each of your dog’s paws, wrapping the towel around their legs one at a time. Take care to ensure that the towel is not too tight or restrictive, as this can cause discomfort.
- Trim Nails or Perform Grooming Tasks: With your dog’s paws securely wrapped in the towel, you can now proceed with trimming their nails or performing other grooming tasks. The towel helps to keep your dog still and prevents them from squirming or pulling away.
- Offer Comfort and Reassurance: Throughout the grooming process, continue to offer your dog comfort and reassurance. Speak to them in a calm and soothing voice, and offer treats or praise for good behavior.
- Remove the Towel: Once you’ve finished grooming your dog, gently unwrap the towel from each of their paws. Take care not to startle or frighten your dog, and continue to offer comfort and praise as you remove the towel.
By following these steps, you can effectively restrain your dog with a towel to make nail clipping or other grooming tasks easier and less stressful for both you and your furry friend.
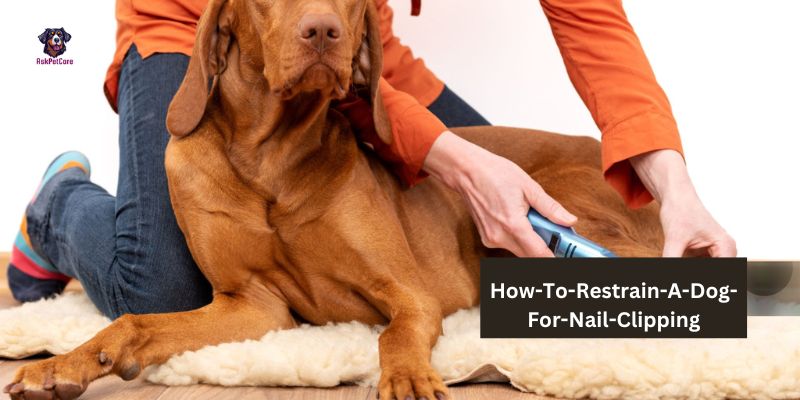
How To Restrain Large Dog To Cut Nails.
Restrain a Large Dog to Cut Nails:
Trimming the nails of a large dog requires a bit more care and attention to ensure both you and your furry friend remain safe and comfortable. Here’s a step-by-step guide on how to restrain a large dog for nail clipping:
- Choose a Suitable Location: Select a quiet and comfortable area where you and your dog can both feel relaxed. This could be a spacious room or an outdoor area with plenty of room to move around.
- Prepare Your Tools: Gather all the necessary tools for nail clipping, including nail clippers, styptic powder (to stop bleeding if needed), and treats for positive reinforcement.
- Position Your Dog: Encourage your dog to sit or lie down in a comfortable position. If possible, have another person assist you by holding your dog’s body still while you trim their nails. This helps to keep your dog calm and secure during the process.
- Use a Leash or Harness: If your dog tends to be strong or excitable, consider using a leash or harness to help keep them in place during nail clipping. Attach the leash to a secure anchor point or have someone hold it firmly while you trim their nails.
- Restrain the Paw: Hold your dog’s paw gently but firmly to prevent them from pulling away or moving around too much. You can also use your other hand to support your body if needed.
- Trim Nails Gradually: Begin by trimming a small amount of the nail at a time, taking care to avoid cutting into the quick—the sensitive part of the nail that contains blood vessels and nerves. If your dog has dark nails, trim conservatively and look for the pinkish area in the center of the nail, which indicates the quick.
- Offer Treats and Positive Reinforcement: Throughout the nail clipping process, offer your dog plenty of treats and praise for their cooperation. This helps to create a positive association with nail clipping and makes the experience more enjoyable for your furry friend.
- Take Breaks if Needed: If your dog becomes restless or agitated during nail clipping, take breaks as needed to allow them to relax and calm down. Offer gentle strokes and soothing words to help reassure them.
- Inspect the Nails: Once you’ve finished trimming all the nails, take a moment to inspect them to ensure they’re all trimmed to the appropriate length and there are no signs of bleeding or injury. If you notice any issues, consult your veterinarian for further guidance.
By following these steps and using gentle restraint techniques, you can effectively restrain a large dog for nail clipping while keeping them calm and comfortable. Remember to take your time, stay patient, and reward your dog for their cooperation throughout the process.
How Do You Cut An Uncooperative Dog’s Nails?
Cutting the nails of an uncooperative dog can be challenging, but with patience and the right approach, it’s possible to get the job done safely. Here’s a step-by-step guide on how to cut the nails of an uncooperative dog:
- Prepare the Environment: Choose a quiet and comfortable area where you and your dog can both feel relaxed. Remove any distractions and ensure you have all the necessary tools on hand, including nail clippers, treats, and styptic powder (to stop bleeding if needed).
- Stay Calm and Patient: Dogs can sense when their owners are stressed or anxious, which can make them more resistant. Stay calm and patient throughout the process, and speak to your dog in a soothing tone of voice to help keep them calm.
- Desensitize Your Dog: Before attempting to cut your dog’s nails, spend some time getting used to the sight and sound of the nail clippers. Let them sniff and investigate the clippers without using them, and offer treats and praise to create a positive association.
- Use Positive Reinforcement: Throughout the nail cutting process, offer plenty of treats and praise for your dog’s cooperation. Reward them for allowing you to handle their paws and for staying still during the trimming process. Positive reinforcement can help to encourage good behavior and make the experience more enjoyable for your dog.
- Start Slowly: If your dog is particularly uncooperative, start by trimming just one nail at a time. Gently hold their paw and trim a small amount of the nail, taking care to avoid cutting into the quick—the sensitive part of the nail that contains blood vessels and nerves. If your dog becomes too agitated, take a break and try again later.
- Use Restraint Techniques: If necessary, use gentle restraint techniques to keep your dog still during the nail-cutting process. This could involve wrapping them in a towel or having another person hold them securely while you trim their nails. Be sure to use gentle restraint methods that do not cause your dog any distress.
- Take Breaks if Needed: If your dog becomes too stressed or agitated during nail cutting, take breaks as needed to allow them to calm down. Offer soothing words and gentle strokes to help reassure them, and resume the trimming process when they are ready.
- Inspect the Nails: Once you’ve finished trimming all the nails, take a moment to inspect them to ensure they’re all trimmed to the appropriate length and there are no signs of bleeding or injury. If you notice any issues, consult your veterinarian for further guidance.
By following these steps and using gentle handling techniques, you can effectively trim the nails of an uncooperative dog while keeping them safe and comfortable. Remember to stay patient and positive throughout the process, and never force your dog to cooperate if they are feeling stressed or uncomfortable.
What To Do When Your Dog Won’t Let You Cut Their Nails?
When your dog won’t let you cut their nails, it can be frustrating and challenging. However, there are several steps you can take to address the issue and make nail clipping a more manageable task. Here’s what to do when your dog won’t let you cut their nails:
- Assess the Situation: First, try to understand why your dog is resisting nail clipping. They may be afraid of the clippers, uncomfortable with having their paws handled, or simply anxious about the process. Identifying the root cause can help you address the problem more effectively.
- Desensitize Your Dog: Take time to desensitize your dog to the nail clipping process gradually. Start by getting them used to the sight and sound of the clippers without using them. Offer treats and praise to create a positive association with the clippers, and gradually work up to touching their paws and trimming their nails.
- Practice Paw Handling: Spend time handling your dog’s paws regularly, even when you’re not planning to trim their nails. Gently touch and massage their paws, and offer treats and praise for cooperation. This helps your dog become more comfortable with having their paws touched and reduces resistance during nail clipping.
- Use Positive Reinforcement: Throughout the nail clipping process, offer plenty of treats and praise for your dog’s cooperation. Reward them for allowing you to handle their paws and for staying still during the trimming process. Positive reinforcement can help to encourage good behavior and make the experience more enjoyable for your dog.
- Take Breaks if Needed: If your dog becomes too stressed or agitated during nail clipping, take breaks as needed to allow them to calm down. Offer soothing words and gentle strokes to help reassure them, and resume the trimming process when they are ready.
- Consider Professional Help: If you’re still struggling to trim your dog’s nails despite your best efforts, consider seeking professional help from a veterinarian or a certified dog trainer. They can offer guidance and assistance tailored to your dog’s specific needs and help you develop a plan to address the issue effectively.
- Explore Alternative Solutions: In some cases, nail grinding may be a more suitable alternative to traditional nail clipping, especially for dogs who are particularly resistant or anxious. Nail grinders use a gentle, rotating abrasive wheel to gradually sand down the nails, which can be less stressful for some dogs.
Remember, patience and persistence are key when it comes to addressing nail-clipping resistance in dogs. Take your time, stay calm, and be consistent in your approach. With patience and positive reinforcement, you can help your dog become more comfortable with nail clipping and make the process easier for both of you.
How Do I Get My Dog To Sit Still For Nail Clipping?
Getting your dog to sit still for nail clipping requires patience, positive reinforcement, and gradual desensitization to the process. Here’s a step-by-step guide on how to achieve this:
- Start with Desensitization:
- Introduce your dog to the nail-clipping tools gradually. Let them sniff and investigate the clippers without using them. Offer treats and praise to create a positive association with the tools.
- Practice Paw Handling:
- Spend time handling your dog’s paws regularly, even when you’re not planning to trim their nails. Gently touch and massage their paws, and offer treats and praise for cooperation. This helps your dog become more comfortable with having their paws touched.
- Associate Nail Clipping with Positive Experiences:
- Before starting the nail clipping process, engage your dog in an activity they enjoy, such as playing fetch or going for a walk. This helps to put them in a positive and relaxed state of mind.
- Use Positive Reinforcement:
- Throughout the nail clipping process, offer plenty of treats and praise for your dog’s cooperation. Reward them for sitting still and remaining calm. Positive reinforcement helps to reinforce good behavior and makes the experience more enjoyable for your dog.
- Take It Slow:
- Start by trimming just one nail at a time, especially if your dog is particularly anxious or resistant. Gently hold their paw and trim a small amount of the nail, taking care to avoid cutting into the quick—the sensitive part of the nail.
- Use Restraint Techniques if Necessary:
- If your dog struggles to sit still during nail clipping, consider using gentle restraint techniques to keep them in place. This could involve wrapping them in a towel or having another person hold them securely while you trim their nails.
- Take Breaks if Needed:
- If your dog becomes stressed or agitated during nail clipping, take breaks as needed to allow them to calm down. Offer soothing words and gentle strokes to help reassure them, and resume the trimming process when they are ready.
- Be Patient and Persistent:
- Nail clipping may take time for your dog to get used to, so be patient and persistent in your efforts. Consistency is key, so continue practicing paw handling and nail clipping regularly to help your dog become more comfortable with the process over time.
By following these steps and using positive reinforcement techniques, you can help your dog learn to sit still for nail clipping and make the process easier and more enjoyable for both of you.
What Is The Proper Way To Hold Dog Nail Clippers?
Holding dog nail clippers properly is essential for a safe and effective nail-trimming session. Here’s how to do it in simple steps:
- Choose the Right Clippers:
- Select nail clippers that are specifically designed for dogs. There are different types available, including guillotine-style, scissors-style, and grinder-style clippers. Choose the type that you feel most comfortable using and that is appropriate for your dog’s nail size and shape.
- Hold the Clippers Correctly:
- Grasp the clippers firmly but gently in one hand, ensuring that you have a secure grip on the handles. Hold the clippers in a way that feels comfortable and allows you to maintain control during the trimming process.
- Position the Clippers:
- Position the clippers perpendicular to your dog’s nail, with the cutting blade facing toward the tip of the nail. This ensures that you cut the nail cleanly and evenly without causing splintering or uneven edges.
- Mind the Quick:
- Be aware of the quick—the sensitive part of the nail that contains blood vessels and nerves. Avoid cutting into the quick, as this can cause pain and bleeding. If your dog has light-colored nails, you may be able to see the quick as pinkish area inside the nail. If your dog has dark-colored nails, trim conservatively and take small cuts to avoid cutting into the quick.
- Trim in Small Increments:
- Trim your dog’s nails in small increments, taking care to trim only the tip of the nail with each cut. This helps to prevent accidentally cutting into the quick and ensures a clean and precise trim.
- Use Controlled Pressure:
- Apply controlled pressure to the clippers when cutting your dog’s nails. Avoid squeezing too hard, as this can crush the nail and cause discomfort. Instead, use gentle but firm pressure to make clean, precise cuts.
- Take Your Time:
- Nail trimming should be done slowly and carefully to ensure your dog’s safety and comfort. Take your time and trim one nail at a time, pausing between each cut to assess the length and avoid cutting too short.
By following these steps and holding the clippers correctly, you can ensure a safe and effective nail-trimming session for your dog. Remember to stay calm and patient throughout the process, and always reward your dog for their cooperation and good behavior.
Dog Nail Trim How Often:
The frequency of dog nail trims depends on several factors, including your dog’s activity level, the type of surfaces they walk on, and the natural wear of their nails. In general, most dogs require nail trims every 4-6 weeks, but some may need them more frequently while others can go longer between trims.
Here are some guidelines to help you determine how often to trim your dog’s nails:
- Regular Monitoring: Check your dog’s nails regularly to assess their length. If you can hear their nails clicking on the floor when they walk, it’s usually a sign that they’re too long and need trimming.
- Activity Level: Dogs who are more active and spend a lot of time walking or running on hard surfaces may naturally wear down their nails more quickly. These dogs may require less frequent nail trims compared to less active dogs.
- Nail Growth Rate: Pay attention to how quickly your dog’s nails grow. Some dogs have faster-growing nails than others, which may require more frequent trimming to prevent them from becoming too long.
- Nail Health: Overgrown nails can cause discomfort and lead to issues like ingrown nails or difficulty walking. If you notice any signs of nail problems, such as cracking, splitting, or bleeding, it’s important to trim your dog’s nails more frequently and consult with your veterinarian if needed.
- Trimming Technique: If you’re unsure about how much to trim, it’s better to err on the side of caution and trim less rather than too much. Gradually trim small amounts of the nail at a time until you reach the desired length, taking care to avoid cutting into the quick—the sensitive part of the nail that contains blood vessels and nerves.
- Professional Grooming: If you’re uncomfortable or unsure about trimming your dog’s nails yourself, consider taking them to a professional groomer or veterinarian for regular nail trims. They can assess your dog’s nail length and trim them safely and effectively.
Ultimately, the best way to determine how often to trim your dog’s nails is to monitor their nail length regularly and adjust your trimming schedule based on their individual needs. By keeping their nails at an appropriate length, you can help prevent discomfort and maintain your dog’s overall paw health.
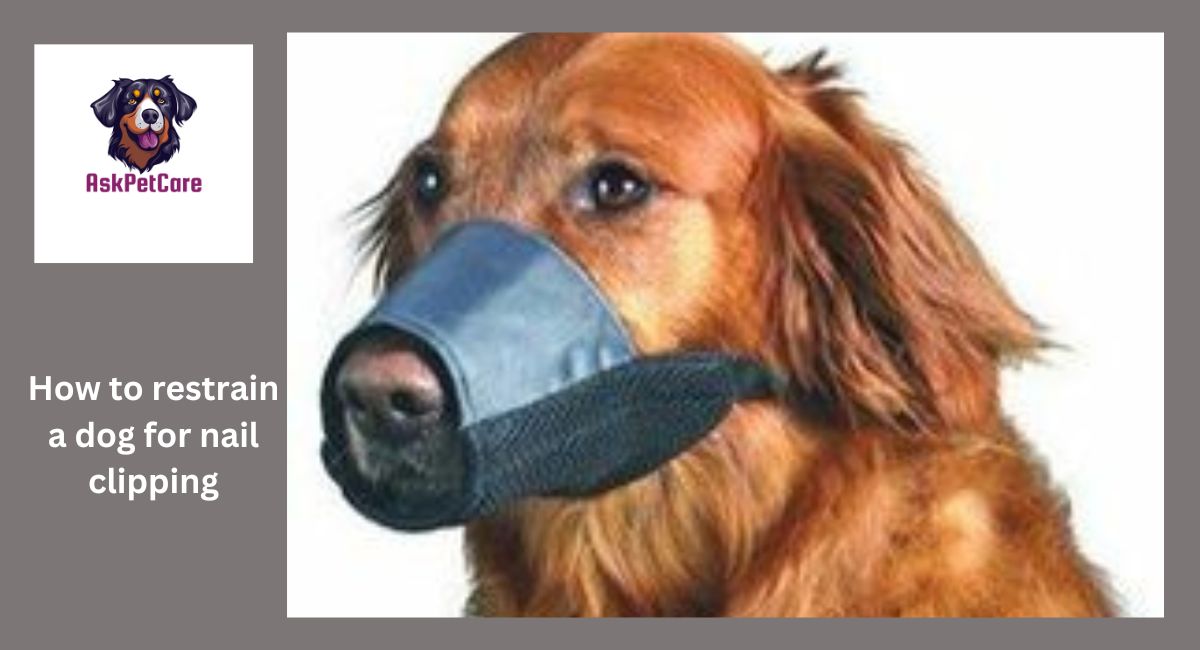
Dog Muzzle:
A dog muzzle is a device that fits over a dog’s snout to prevent them from biting or chewing. It is commonly used in situations where a dog may be anxious, aggressive, or in need of restraint for safety reasons. Muzzles are available in various designs and materials, and it’s essential to choose one that fits your dog comfortably and securely.
Here are some key points to know about dog muzzles:
- Types of Muzzles: There are several types of muzzles available, including basket muzzles, soft muzzles, and grooming muzzles. Basket muzzles allow a dog to pant, drink water, and take treats while wearing them, making them suitable for longer periods of wear. Soft muzzles are made of flexible materials like nylon or mesh and are often used for short-term restraint. Grooming muzzles are designed to keep a dog’s mouth closed during grooming procedures.
- Purpose: Dog muzzles are primarily used to prevent biting or chewing behaviors in situations where a dog may pose a risk to themselves or others. They can be used during veterinary visits, grooming sessions, training classes, or in public settings where a dog may encounter unfamiliar people or animals. Muzzles can also be used as a safety measure during emergencies or when introducing a new dog to a household with existing pets.
- Proper Fit: It’s essential to choose a muzzle that fits your dog properly to ensure their comfort and safety. The muzzle should be snug enough to prevent the dog from removing it but not so tight that it causes discomfort or restricts their ability to pant or open their mouth. Measure your dog’s snout circumference and length to determine the appropriate size of muzzle.
- Introduction and Training: Introduce the muzzle to your dog gradually and associate it with positive experiences, such as treats or playtime. Allow your dog to sniff and explore the muzzle before attempting to put it on. Once they are comfortable with the muzzle, gradually increase the duration of wear, starting with short periods and gradually extending the time as your dog becomes more accustomed to it.
- Monitoring and Supervision: Always supervise your dog when they are wearing a muzzle and never leave them unattended for extended periods. Monitor their behavior closely and remove the muzzle if you notice any signs of distress or discomfort. Regularly check the fit of the muzzle and ensure that it is not causing any irritation or rubbing on your dog’s skin.
- Consultation with a Professional: If you’re unsure about how to choose or use a muzzle for your dog, consult with a veterinarian, dog trainer, or behaviorist for guidance. They can provide advice on selecting the appropriate type of muzzle for your dog’s needs and help you implement a training plan for muzzle introduction and acceptance.
Overall, a dog muzzle can be a valuable tool for managing behavior and ensuring the safety of your dog and those around them. When used correctly and responsibly, muzzles can help prevent accidents and provide peace of mind in various situations.
Dog Broken Nail Home Treatment:
If your dog has a broken nail, it’s essential to address it promptly to alleviate pain and prevent infection. Here’s a home treatment guide for a dog with a broken nail:
- Assess the Damage: Carefully examine the broken nail to assess the extent of the damage. If the nail is partially broken but still attached, it may cause discomfort but can often be managed at home. However, if the nail is completely torn off or if there is excessive bleeding or signs of infection, seek veterinary attention immediately.
- Control Bleeding: If there is bleeding from the broken nail, apply gentle pressure with a clean cloth or gauze pad to help stop the bleeding. You can also use styptic powder or cornstarch to aid in clotting. Dip the nail into the powder or apply it directly to the bleeding area and maintain pressure for a few minutes until the bleeding stops.
- Clean the Wound: Once the bleeding has stopped, gently clean the area around the broken nail with a mild antiseptic solution or saline solution. Avoid using hydrogen peroxide or alcohol, as these can be too harsh and may cause further irritation.
- Trim Excess Nail: If the broken nail is hanging loose and causing discomfort, you may need to trim it to prevent further injury. Use sharp, clean nail clippers to carefully trim the broken nail, taking care not to cut into the quick—the sensitive part of the nail that contains blood vessels and nerves. If you’re unsure, it’s best to leave this step to a veterinarian.
- Apply Antibacterial Ointment: After cleaning the wound, apply a thin layer of antibiotic ointment to help prevent infection and promote healing. Be sure to use a product that is safe for dogs and follow the manufacturer’s instructions for application.
- Protect the Nail: Depending on the severity of the break and your dog’s level of discomfort, you may need to protect the broken nail to prevent further injury. You can use a small bandage or gauze pad to cover the area and secure it with medical tape. Alternatively, you can use a dog boot or sock to protect the paw while the nail heals.
- Monitor for Signs of Infection: Keep a close eye on the broken nail and surrounding area for signs of infection, such as redness, swelling, discharge, or increased pain. If you notice any of these symptoms or if your dog is limping or showing signs of distress, seek veterinary attention promptly.
- Prevent Further Injury: To prevent further injury to the broken nail, avoid activities that could aggravate the injury, such as running, jumping, or rough play. Keep your dog’s nails trimmed regularly to minimize the risk of future breaks.
If your dog’s broken nail does not improve or if you have any concerns about their condition, consult with your veterinarian for further evaluation and treatment. They can guide managing the injury and ensure that your dog receives the appropriate care and support for a speedy recovery.
What Happens If You Cut A Dog Nail Too Short
If you cut a dog’s nail too short and accidentally trim into the quick—the sensitive part of the nail that contains blood vessels and nerves—it can cause pain, bleeding, and discomfort for your dog. Here’s what happens when you cut a dog’s nail too short:
- Pain and Discomfort: Cutting into the quick can be painful for your dog, as it exposes the sensitive nerve endings and blood vessels within the nail. Your dog may yelp, flinch, or pull away in response to the pain.
- Bleeding: Cutting the nail too short can result in bleeding from the exposed quick. The bleeding may be minimal or more severe, depending on the depth of the cut and the size of the blood vessels. It’s important to apply pressure to the nail to help stop the bleeding and prevent further discomfort for your dog.
- Risk of Infection: A cut nail exposes the inner layers of the nail to bacteria and other pathogens, increasing the risk of infection. It’s essential to clean the wound thoroughly and apply an antibacterial ointment to reduce the risk of infection and promote healing.
- Limping or Lameness: After trimming a nail too short, your dog may experience limping or lameness, especially if the pain and discomfort persist. They may avoid putting weight on the affected paw and may exhibit signs of distress or agitation.
- Secondary Complications: In some cases, cutting a nail too short can lead to secondary complications, such as ingrown nails, nail deformities, or changes in gait or posture. These issues may require veterinary attention to address and may impact your dog’s mobility and comfort.
- Fear or Anxiety: If your dog experiences pain or discomfort during nail trimming, they may develop fear or anxiety associated with the process. This can make future nail trims more challenging and stressful for both you and your dog.
To minimize the risk of cutting your dog’s nails too short, it’s essential to trim them carefully and gradually, taking small cuts and avoiding the quick. If you do accidentally cut the nail too short, remain calm and provide comfort and reassurance to your dog. Apply pressure to the nail to stop the bleeding, clean the wound thoroughly, and monitor for signs of infection or further complications. If you’re unsure about how to handle the situation or if your dog is experiencing significant pain or bleeding, consult with your veterinarian for guidance and assistance.
How To Restrain A Rabbit For Nail Clipping
Restrain a Rabbit for Nail Clipping:
- Prepare a Safe Environment: Choose a quiet and comfortable area for nail clipping, preferably a flat surface like a table or counter. Ensure there are no hazards nearby that could startle or harm the rabbit.
- Gather Supplies: Have all necessary supplies ready, including nail clippers specifically designed for small animals, styptic powder (to stop bleeding if needed), and treats for positive reinforcement.
- Use a Towel or Blanket: Gently wrap the rabbit in a towel or blanket, leaving their head exposed. This helps to restrain their movement and keeps them calm during the nail clipping process.
- Position the Rabbit: Hold the rabbit securely but gently in your lap or on a flat surface. Ensure they are comfortable and have enough support to prevent them from wriggling or escaping.
- Secure Each Paw: Take one paw at a time and hold it gently but firmly between your fingers. Use your thumb to press the pad and extend the nail for clipping.
- Trim the Nails: Using small, precise movements, trim the tip of each nail, taking care to avoid cutting into the quick—the sensitive part of the nail that contains blood vessels and nerves. It’s better to trim less than too much to prevent injury.
- Monitor for Signs of Discomfort: Watch for any signs of discomfort or distress from the rabbit, such as vocalization, squirming, or attempting to escape. If the rabbit becomes too agitated, take a break and try again later.
- Reward with Treats: Offer treats and praise throughout the nail-clipping process to reward the rabbit for their cooperation. This helps to create a positive association with nail trimming and makes future sessions easier.
- Check for Bleeding: After trimming each nail, check for any signs of bleeding. If bleeding occurs, apply styptic powder or cornstarch to the affected nail to help stop the bleeding.
- Release and Comfort: Once all nails have been trimmed, gently release the rabbit from the towel or blanket and offer comfort and reassurance. Provide treats and praise to reinforce positive behavior.
- Repeat as Needed: Depending on the rabbit’s nail growth, you may need to trim their nails every 4-6 weeks. Regular trimming helps to prevent overgrowth and keeps the rabbit’s nails healthy and comfortable.
By following these steps and using gentle restraint techniques, you can effectively trim a rabbit’s nails while keeping them calm and comfortable. If you’re unsure about how to trim your rabbit’s nails or if the rabbit is particularly nervous or resistant, consider seeking guidance from a veterinarian or experienced rabbit owner.
How to restrain a dog for nail clipping: different methods
Start by getting your dog used to having their paws touched
. Gently massage their feet and nails regularly, making it a positive experience.
Choose a comfortable position.
Place your dog on a non-slip surface, such as a grooming table or the floor. Make sure they are in a comfortable position and have good footing.
Use a muzzle if necessary.
If your dog is particularly anxious or aggressive, a muzzle can help prevent them from biting.
How to restrain a dog for nail clipping
If you feel uncomfortable, use the following instruments to restrain the dog:
Leash and collar restraint:
- Attach a leash to the collar to control movement.
- The collar should fit comfortably around the neck.
- Used during walks or to keep the dog close.

How to restrain a dog for nail clipping
Harness Restraint:
- Harnesses fit around the body, distributing pressure.
- It is useful for dogs that pull on leashes or have respiratory issues.
- Connects to the leash, reducing neck strain.
Crates or enclosures:
- Provides a safe, secure space for dogs to rest or stay confined.
- Crates should be large enough for a dog to move comfortably.
- Enclosures can be indoor pens or outdoor kennels.
Tethering:
- Attach a leash to a fixed object to limit movement.
- Allows dogs freedom within a specific area.
- Prevents wandering off while still giving some mobility.
Gentle physical restraint:
- Use hands to gently hold the dog or guide movements.
- Hold a collar or steady body during grooming or medication.
- Be gentle to avoid causing discomfort.
Sedation or medication:
- It was prescribed by a veterinarian to calm the dog.
- Used during procedures or travel to reduce anxiety.
- Should only be administered under the vet’s guidance.
These methods provide options for controlling and managing a dog’s behavior and movement in various situations.
How to restrain a dog for nail clipping
How do you restrain a small dog for nail clipping?
- Place your small dog on a non-slip surface, like a table or a rubber mat.
- Hold your dog gently but firmly, ensuring they feel secure.
- You may wrap them in a towel to limit movement if they’re turning.
- Use treats and positive support to keep them calm and cooperative.
- Proceed with clipping their nails carefully, avoiding the quick (the blood vessel inside the nail).
How to keep dog nails short without clipping:
- Regular exercise on hard surfaces can naturally wear down your dog’s nails.
- Provide your dog with plenty of opportunities to scratch on rough surfaces like concrete or asphalt.
- Using a scratching post or pad indoors can also help file down nails.
- Some dogs may naturally keep their nails short through activity, but regular monitoring is still necessary.
My dog won’t let me cut his nails; what can I do?
- Start by gradually desensitizing your dog to nail trimming by touching their paws and nails regularly.
- Use positive support techniques, such as offering treats and praise, to create positive associations with nail trimming.
- Introduce the nail clippers slowly, allowing your dog to smell and investigate them before attempting to clip.
- Consider taking help from a professional dog groomer or veterinarian who can provide guidance and assistance.
If necessary, your vet may recommend sedation or medication to help your dog remain calm during nail-trimming sessions.
Handling methods indeed differ between puppies and senior dogs.
Puppies:
- Puppies have lots of energy and can be easily frightened.
- Handle them gently, supporting their bodies and avoiding sudden movements.
- Keep interactions short and positive to prevent overwhelming them.
- Use treats and praise to help them feel good about being handled.
Senior Dogs:
- Senior dogs may have trouble moving due to conditions like arthritis.
- Handle them gently and give them extra support, especially when lifting or moving them.
- Watch out for any sore spots on their body and avoid putting pressure on those areas.
- Let senior dogs take their time moving around, and give them plenty of rest when needed.
- Consider using ramps or steps to help senior dogs access elevated surfaces more easily.
By adapting your handling techniques to suit the age and condition of your dog, you can ensure that they feel safe, comfortable, and supported during connections and grooming sessions.
Again, remember that if handling the dog is not proper, then you and your dog will not be safe.
If you have pugs at home and want to learn how to trim their nails, read my article.
Here are some reference books that are considered authoritative on the topic of dog care, including nail care:
- “The Complete Dog Owner’s Manual” by Dr. Bruce Fogle
- “The Ultimate Guide to Dog Care: Everything You Need to Know to Keep Your Dog Happy and Healthy” by Amy Marder and Andrew Luescher